Help your heating with our blog posts

STEP 1 - Turn on heating
Turn on your central heating, and get radiators up to temperature. You are checking to see if they are hot all over, be careful though as they can get very hot!.
STEP 2 - Identifying radiators which need attention
If you have radiators that are cold at the top but are hot lower down, then this is a sign you have air in that radiator. make a note of all radiators that are cold at the top, then move on to step 2.
STEP 2 - Bleeding Radiators
Switch off the heating and allow the radiators to cool.
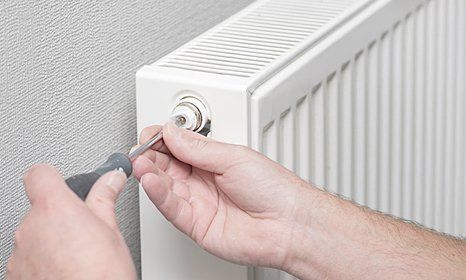
Once cool, use a radiator key (which you can purchase from any DIY store or online) and a large cloth to catch the water.
Find the bleed valve which will be at the top of the radiator either on the left or right hand sider.
Insert the radiator key and hold the cloth under the valve, turn the key slowly until you start to hear a hiss, this is the air being removed. Once all the air is removed you will start to get water coming out the valve, quickly turn the key to shut the valve and move on to the next radiator.
Remove the air from all the radiators you noted as having air.
STEP 3 - Check system Pressure
If you have an open system ( small tank in the loft with a ball valve) then the system will fill itself back up and no further action is required.
If you have a sealed system ( where you have to manually top the pressure up) find the pressure gauge and check that you have at least 1 BAR of pressure.
If you do need to top the pressure up, find the filling loop and top the pressure up to just over the 1 BAR position.
You should check the gauge again later, after a couple of hours of no heating just in case the pressure has dropped a bit more. Just top it back up to just over the 1 BAR position.
That is it you have successfully removed the air from your radiators.


